

Before you start
- Add the class first. See Add a class.
- Add the room it runs in. See Add rooms and equipment.
Add the class
1
Open the Add menu
In the menu, go to Calendar, go to the day you want, then select Add and choose Class. To start at a set time, select an empty time on the grid first.
2
Choose the class
Under Class, choose which class it is.
3
Choose how often
One time is chosen, on the day you’re looking at. To run it weekly, choose Every week and tick the days.
4
Choose the time, room and teacher
Check the Start time, choose the Room and the Teacher (or No teacher), and the number of Spots.
5
Save
Select Save.
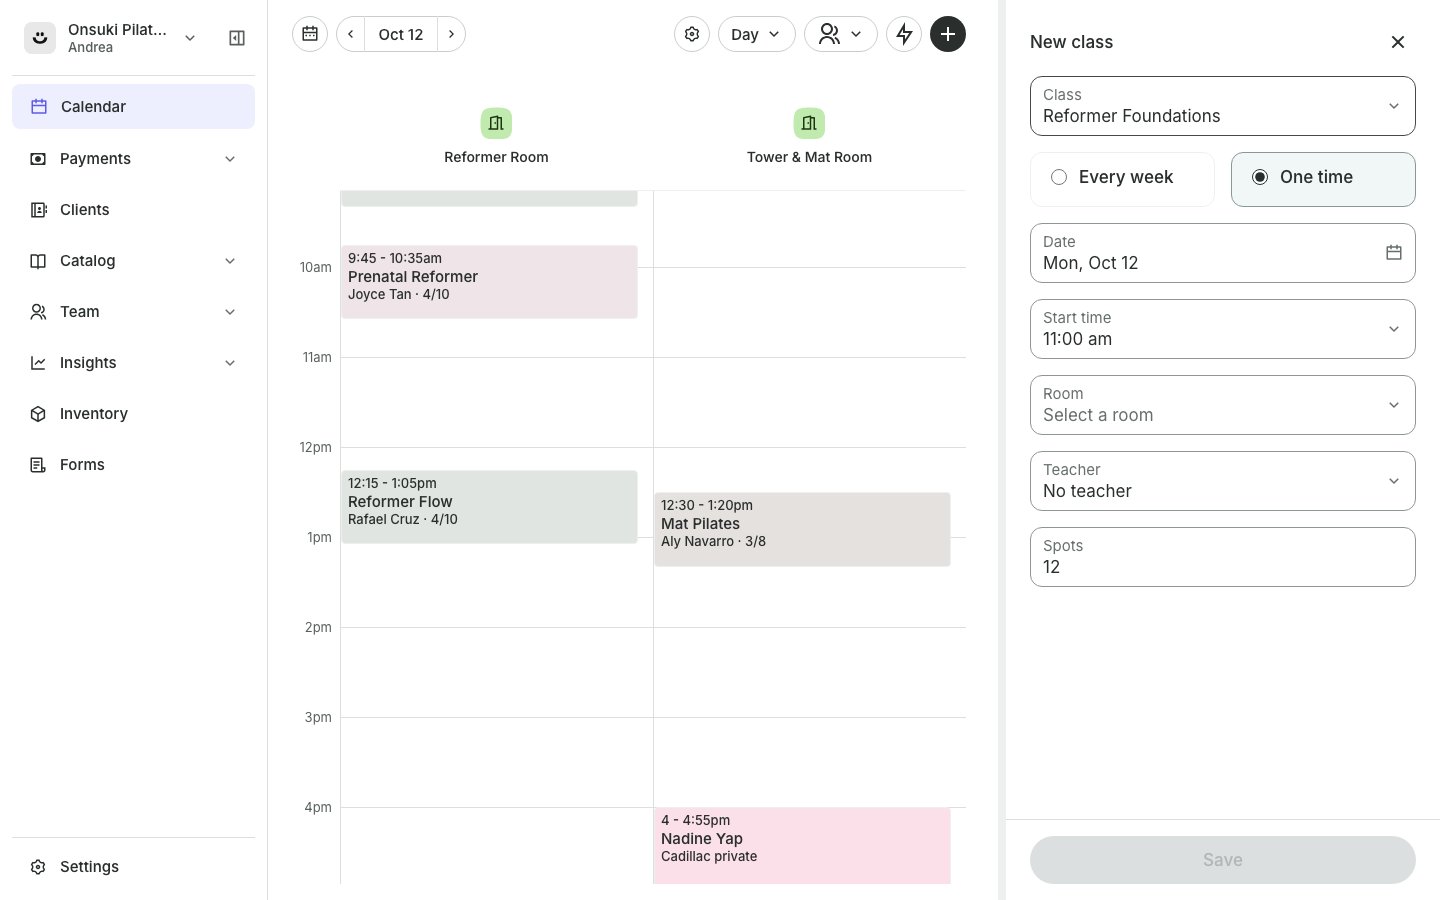
The New class panel opened from the calendar
Good to know
- Don’t see Class under Add? It shows when Classes is on and your business has at least one class. You also need the Manage classes permission.
- Don’t see One time? Adding a single date also needs the Other team members’ calendars permission. Without it, choose Every week.
- If the room or the teacher is already busy at that time, Onsuki skips it and tells you.
- To change or stop a weekly time later, open the class in Catalog, Classes. See Schedule classes.